In this post we’ll learn how to add your custom meta fields into WooCommerce’s Product data metabox; how to add fields and also how to add your own custom tab. We’ll go into detail about how to add your fields, where to add them, how to save them, and finally how to display them in frontend.
Adding custom fields to existing panels
First we’ll look at how to add a field to existing panels. We need to hook into two hooks; one for outputting the field, and one for saving the value of it. The first hook depends on which tab you want to display your field in.

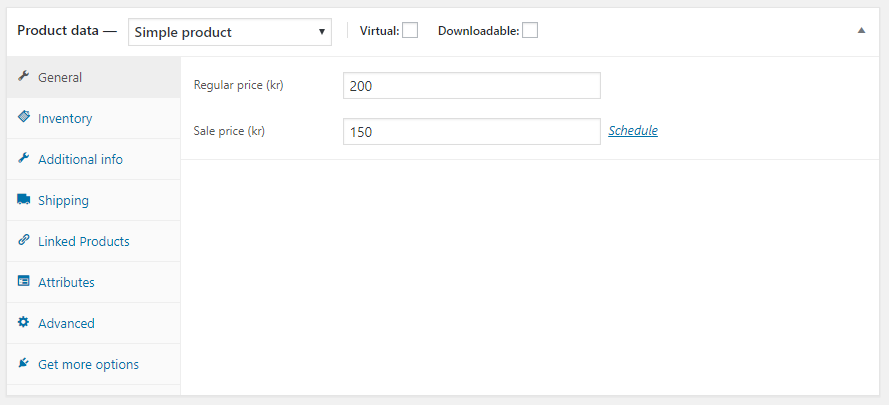
Keep in mind that tab visibility differs depending on product type. For example, “General” tab gets removed when you switch to a grouped product type. So not only should you consider where your custom fields logically fits in, but you need to consider a panel that is visible for all your desired product types. This is a list of the most general available hooks:
woocommerce_product_options_general_product_data(“General”)woocommerce_product_options_inventory_product_data(“Inventory”)woocommerce_product_options_shipping(“Shipping”)woocommerce_product_options_related(“Linked Products”)woocommerce_product_options_attributes(“Attributes”)woocommerce_product_options_advanced(“Advanced”)
Adding a form input
As for outputting a form input you could manually output the form input HTML (e.g. <input type="text"...>), but WooCommerce offers simple functions for easily adding fields of any types. I recommend using those. Check out WooCommerce’s overview of all possible input types here, and what arguments you can pass to control the output.
As for this tutorial I’m going to add a simple text input inside the inventory tab for writing the number of items in each package. As for the key your custom value gets saved as, always add an underscore “_” before it, in my case it’ll be “_number_in_package”:
add_action('woocommerce_product_options_inventory_product_data', function() {
	woocommerce_wp_text_input([
        	'id' => '_number_in_package',
	        'label' => __('Number in package', 'txtdomain'),
	]);
});
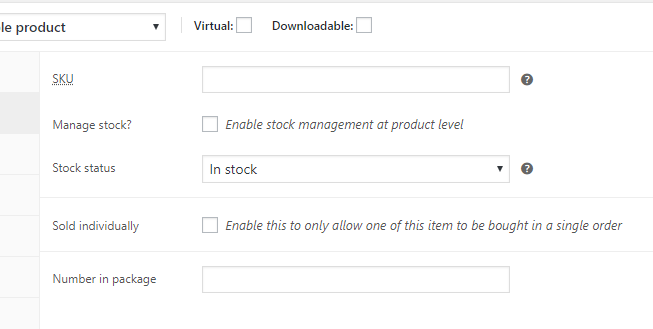
Save and edit a product. You should see your custom field appear in the bottom of Inventory tab:

A note on field visibility depending on product type
WooCommerce’s Product data metabox comes with a great deal of Javascript that hides and shows both fields and tabs/panels. You can easily utilize this if you want your field to be visible only for specific product types, by providing specific class names to your field.
Let’s say you want your field to only be displayed if the product is of type simple product, or you want it to be hidden if the product is a variable product. WooCommerce listens to specific class names such as show_if_<producttype> and hide_if_<producttype> and you can combine multiple classes to finetune when your field should be hidden or visible.
For example, if I want my field to only be visible for simple products; I’ll add this in ‘wrapper_class‘ to my field input:
add_action('woocommerce_product_options_inventory_product_data', function() {
	woocommerce_wp_text_input([
		'id' => '_number_in_package',
		'label' => __('Number in package', 'txtdomain'),
		'wrapper_class' => 'show_if_simple'
	]);
});
You could also set wrapper_class to e.g. ‘show_if_simple show_if_grouped‘ to have the field only visible for products that are either simple or grouped. Try it out yourself!
Saving your custom field
As of right now, anything you enter into your field is not being saved. Let’s do that next. We hook onto woocommerce_process_product_meta and saves the value from PHP’s global $_POST (form submission).
add_action('woocommerce_process_product_meta', function($post_id) {
	$product = wc_get_product($post_id);
	$num_package = isset($_POST['_number_in_package']) ? $_POST['_number_in_package'] : '';
	$product->update_meta_data('_number_in_package', sanitize_text_field($num_package));
	$product->save();
});
Let me quickly explain the above code. You could simply save the field by using update_post_meta(), but in more recent versions of WooCommerce handling product meta has been greatly improved. As long as you have the product object (which we get by calling wc_get_product() with the post ID) you can easily manipulate any product information in the object, and finally call save() once for updating any changes. This is very beneficial especially if you want to save multiple fields – in which case you don’t need to run database operations for each field, just that one final time when you call save().
Use update_meta_data() on the object for each meta data you want to save.
With the above function your field should now get saved when you update it in edit product! Also note that using WooCommerce’s functions for outputting the field, you don’t have to manually get the value of your field before outputting the field – it’s fully automatic.
Outputting your custom field in frontend
First step is figuring out which hook you want to use for outputting your custom field. WooCommerce offers loads of available hooks for controlling specifically where you want the output. If you are unsure, take a look at plugins/woocommerce/templates/ and inside these files you can easily find an appropriate hook. You can also override the template and add the output in the template, but I always recommend using hooks instead.
As for me, I want my custom field to be output in single product, inside the meta div – along where WooCommerce outputs SKU and category. For this I’ll use the hook woocommerce_product_meta_start. Inside the hooks (as with almost all template hooks) you can access the global post object. I’ll follow the same rule of thumb as in saving my field; use get_meta() on the product object for getting my custom field:
add_action('woocommerce_product_meta_start', function() {
	global $post;
	$product = wc_get_product($post->ID);
	$num_package = $product->get_meta('_number_in_package');
	if (!empty($num_package)) {
		printf('<div class="custom-sku">%s: %s</div>', __('Number in package', 'txtdomain'), $num_package);
	}
});
Adding a custom tab and panel to product data metabox
If you want to add a collection of custom fields that logically belong together, it could be a good idea to group them up inside a custom tab. To add a custom tab to Product data metabox we need to hook onto a filter for adding the tab itself, and a hook for outputting the panel’s content. Finally we still need to add the same hook as above for saving our fields.
For example’s sake I’m going to add a custom panel called “Additional info” where I want to add a text input, a checkbox and a number input.
First, we filter woocommerce_product_data_tabs and add our tab to its array.
add_filter('woocommerce_product_data_tabs', function($tabs) {
	$tabs['additional_info'] = [
		'label' => __('Additional info', 'txtdomain'),
		'target' => 'additional_product_data',
		'class' => ['hide_if_external'],
		'priority' => 25
	];
	return $tabs;
});
There’s some useful arguments we can provide here. You can for example use ‘class‘ to control the tab visibility depending on product type. If you missed it, check out the section about field visibility mentioned above. But keep in mind that in tabs you need to provide the classes as an array, not a string. You can also provide ‘priority‘ to decide where your tab should appear. Using e.g. 25 will position the tab right after “Inventory”.
As default your tab will appear with a wrench as icon. Unfortunately there is (as of now) no way to control it via the filter. If this is important for you, you can add admin CSS and provide a different class to your tab. Here is an overview of available icons in WooCommerce.
Panel output
Next step is hooking onto woocommerce_product_data_panels and output the content of your panel. An important note here is to start the output with a div with an id attribute of same name as you provided as key in tabs (in my case ‘additional_info‘). As for the content it’s up to you – you can add whatever HTML you want, but I recommend using WooCommerce’s functions for outputting form fields. The same benefits for hiding or showing fields will work here as well.
add_action('woocommerce_product_data_panels', function() {
	?><div id="additional_product_data" class="panel woocommerce_options_panel hidden"><?php

	woocommerce_wp_text_input([
		'id' => '_dummy_text_input',
		'label' => __('Dummy text input', 'txtdomain'),
		'wrapper_class' => 'show_if_simple',
	]);
	woocommerce_wp_checkbox([
		'id' => '_dummy_checkbox',
		'label' => __('Dummy checkbox', 'txtdomain'),
		'wrapper_class' => 'hide_if_grouped',
	]);
	woocommerce_wp_text_input([
		'id' => '_dummy_number_input',
		'label' => __('Dummy number input', 'txtdomain'),
		'type' => 'number',
		'custom_attributes' => [
			'step' => '1',
			'min' => '0'
		]
	]);

	?></div><?php
});
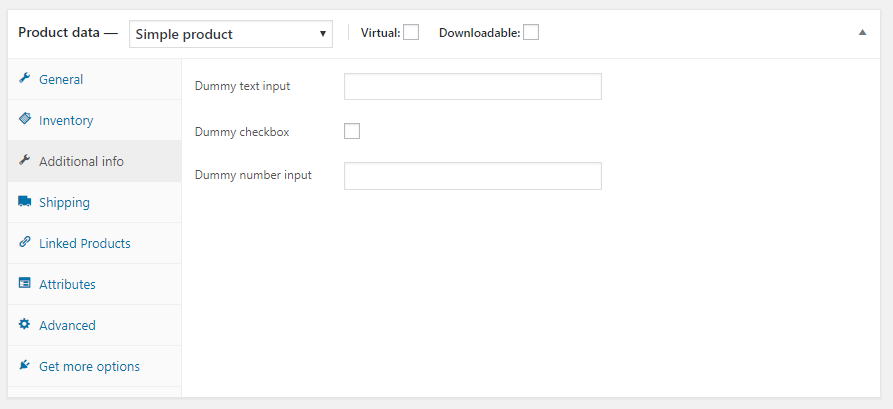
After saving, you should now see the tab and its content in Product data metabox (unless the product is a external product of course).

All that remains is to save the data entered in your custom fields, and for this we use the same process as above:
add_action('woocommerce_process_product_meta', function($post_id) {
	$product = wc_get_product($post_id);

	$product->update_meta_data('_dummy_text_input', sanitize_text_field($_POST['_dummy_text_input']));

	$dummy_checkbox = isset($_POST['_dummy_checkbox']) ? 'yes' : '';
	$product->update_meta_data('_dummy_checkbox', $dummy_checkbox);

	$product->update_meta_data('_dummy_number_input', sanitize_text_field($_POST['_dummy_number_input']));

	$product->save();
});
Note: In WooCommerce there’s a general rule where all checkboxes get saved as ‘yes‘ if they are checked, or as empty string if they are unchecked. By following WooCommerce’s rule and saving my checked checkbox as ‘yes‘, this makes sure my woocommerce_wp_checkbox() works as intended when it fetches the current value of my field.
Conclusion
In this post I’ll shown how to add your custom fields to WooCommerce’s product data metabox, how to save them, how to control their visibility, and a simple example of outputting your field in frontend. I also showed how to add a custom tab to the metabox and add your fields in there. I hope this helped you in customizing WooCommerce yourself!