This post will go through how to add custom endpoints to WooCommerce‘s “My Account” page. We can make it accessible in two ways; either as an own custom tab, or as a button to each order in the “Orders” tab.
WooCommerce’s “My Account” page is using WordPress’ built-in functionality for endpoints which makes it easy to adjust or add your own endpoints. If you are unfamiliar with endpoints, I recommend reading my post that goes into detail about how to add custom endpoints in WordPress.
How you make your custom endpoint accessible for the user from “My Account” depends entirely on your webshop’s needs. If you simply want a general page for additional information you could add this page as its own tab. If you however want your endpoint to be related to each order, you need to add your endpoint to each order row in the “Orders” tab. In this post we’ll look at both methods.
Adding a Custom Tab and Endpoint to “My Account”
For example’s sake let’s assume our webshop sells software and we need a place to show our customers’s license keys in their “My Account” page. We’ll add a custom tab “License keys” which should output all valid license keys registered for that user.
Adding a custom endpoint
In our theme’s functions.php or plugin code, we first add our custom endpoint using add_rewrite_endpoint(). As first argument to this we provide an unique key. In the example below I’ve called the endpoint ‘license-keys‘.
add_action('init', function() {
	add_rewrite_endpoint('license-keys', EP_ROOT | EP_PAGES);
});
Keep in mind that WordPress automatically adds our key to query vars when using add_rewrite_endpoint(), so there is no need to filter query_vars.
Adding a custom tab
The next step is adding a tab to “My Account” page tabs. We do this with the filter woocommerce_account_menu_items. The array provided by the filter contains all the tab keys and their corresponding label.
You could simply append your tab at the end of the array, but if you want more control of where your tab should appear, you need to manipulate the array using PHP functions. In the example above I want it at the end, but before the “Log out” tab. So I take the “Log out” tab out, insert my tab, and then put back the “Log out” tab after.
add_filter('woocommerce_account_menu_items', function($items) {
	$logout = $items['customer-logout'];
	unset($items['customer-logout']);
	$items['license-keys'] = __('License keys', 'txtdomain');
	$items['customer-logout'] = $logout;
	return $items;
});
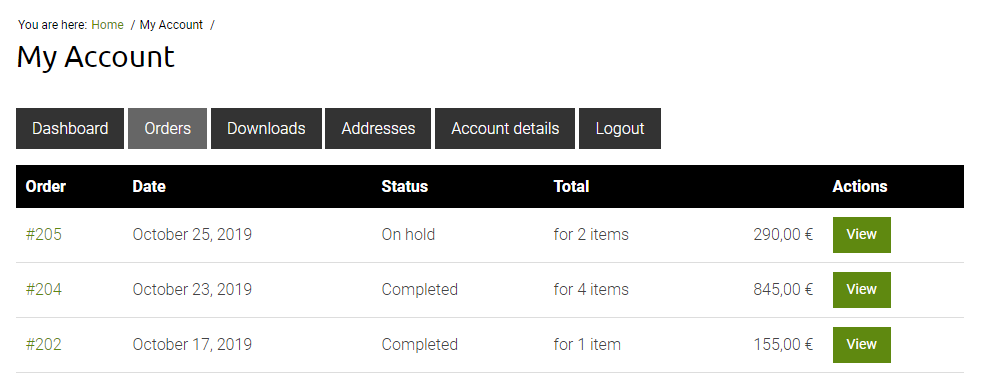
If you refresh your My Account page now, you should see your tab appear before “Log out”. Clicking on it takes you to the URL “<example.com>/my-account/license-keys/“. However you won’t see anything change when clicking on the tab. That’s because we haven’t defined what to output. That’s our next step.
Rendering the custom tab’s content
WooCommerce offers the hook woocommerce_account_<endpoint key>_endpoint for outputting content in “My Account”, where you replace <endpoint key> with your custom endpoint key. In our example the correct hook would be woocommerce_account_license-keys_endpoint.
add_action('woocommerce_account_license-keys_endpoint', function() {
	_e('Your license keys', 'txtdomain');
});
As for the actual output of the tab this is entirely up to you. You might make a query, fetch some information and then output it. However it’s recommended to use templates for outputting HTML instead of outputting the complete HTML output directly inside our function. WooCommerce offers great functionality for templates, so we’ll use that.
By using wc_get_template() we can provide a custom template (it doesn’t need to be one of WooCommerce’s templates). As second argument we can define variables that will be passed onto the template file. Following WooCommerce’s established structure, we create a custom WooCommerce template that we call license-keys.php in <theme>/woocommerce/myaccount/ folder.
add_action('woocommerce_account_license-keys_endpoint', function() {
	$licenses = [];  // Replace with function to return licenses for current logged in user

	wc_get_template('myaccount/license-keys.php', [
		'licenses' => $licenses
	]);
});
Go ahead and create an empty file <theme>/woocommerce/myaccount/license-keys.php. Inside this is where you define the output of your custom tab. We also have access all variables we passed in the array to wc_get_template(). So in our case the $licenses variable will be available and populated with the information we passed on from our endpoint function. You can pass on as many variables as you need.
Adding a endpoint and a custom button to each order in “My Account” page
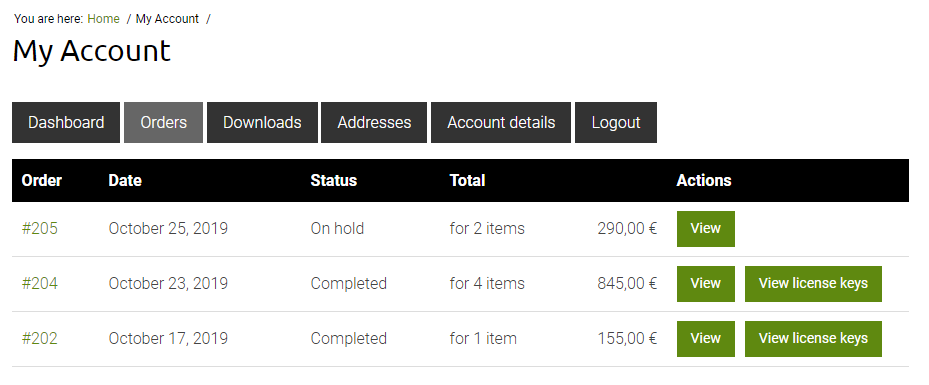
Let’s continue with the same example above; assuming that your webshop is selling software and you need to show customer’s license keys somewhere. But instead of adding a custom tab to show them all, maybe you rather want to show license keys connected to one specific order? We could add a custom button next to “View” in the orders overview in My Account:
Let’s start by doing the same as we did above: registering a custom endpoint:
Register a custom endpoint
add_action('init', function() {
	add_rewrite_endpoint('license-keys', EP_ROOT | EP_PAGES);
});
Don’t forget to flush permalinks (go to Settings > Permalinks and hit the Save button)!
Add a custom action (and a button)
Next step is adding the button by using the filter woocommerce_my_account_my_orders_actions. As second argument to this filter you get the order object. That is very useful; we want to check that the order is completed and paid for, so that we don’t show license keys for unpaid or cancelled orders. With the order object we also get ahold of the order ID which is most likely necessary for quering license keys for products in that order. In the code below I simply check whether or not order status is completed. You probably need to add your own code to check whether or not there are any license keys to show per order.
In order to add a custom action we need to provide an unique key and an array with self-explanatory values for ‘url‘ and ‘name‘. As for URL we use WordPress’ function for returning endpoint URL: wc_get_endpoint_url(). As we need to pass order ID as well, we set order ID as second argument to this function, which results in the following URL: <example.com>/my-account/license-keys/<order ID>/.
add_filter('woocommerce_my_account_my_orders_actions', function($actions, $order) {
	if ($order->get_status() == 'completed') {
		$actions['view-license-keys'] = [
			'url' => wc_get_endpoint_url('license-keys', $order->get_id()),
			'name' => __('View license keys', 'txtdomain')
		];
	}
	return $actions;
}, 10, 2);
This should add a new button for each completed order:
Now all we need is the template to show for the endpoint license-keys.
Rendering the endpoint
The way endpoints work in WordPress is that whatever comes after the endpoint is the value of that query variable; or in other words; when we visit for example the URL <example.com>/my-account/license-keys/204/ we can use get_query_var('license-keys') in order to get the order ID; 204.
For outputting content for our custom endpoint, we hook onto woocommerce_account_<endpoint key>_endpoint which in our case would be woocommerce_account_license-keys_endpoint. Inside that function we can use get_query_var() for getting the order ID, and with that query the order for any license keys.
add_action('woocommerce_account_license-keys_endpoint', function() {
	$order_id = get_query_var('license-keys');
	$licenses = [];  // Function to return licenses for order ID

	wc_get_template('myaccount/license-keys.php', [
		'licenses' => $licenses,
		'order_id' => $order_id
	]);
});
The actual HTML output of your custom template “myaccount/license-keys.php” depends entirely on your needs. Presumably you would have used order ID to gather the license keys in some array and pass that along to the template for a nice output. In the code above I’m also passing order ID so this is accessible as $order_id inside the template (e.g. for outputting a nice title “License keys for order #204”).