
In a recent WordPress update it is now possible and pretty simple to add custom meta fields to menu items. In this post we’ll learn how to add our custom settings to menu items, update their settings, and finally how to take the meta data in use.
Recently WordPress announced support for adding custom fields to menu items in version 5.4. Two new actions were added that allow developers to add custom fields in WordPress menu admin page and in Customizer’s menu editor. In this post we’ll focus on one of them, the one for WordPress menu admin page.
With this change there’s no more need to force theme or plugin users to remember and type out class names to activate menu item “settings”. This has until now been a common process for things like making a menu item look like a button, or switch between different designs of dropdown. Often in combination of a custom menu walker.
What we’ll make in this tutorial
With the new hook to menu items and WordPress’ support for adding meta data to menu items there is really no limit as to what kind of settings you want. The process depends on what your end result is. In most cases adding a custom CSS class to the menu item is enough.
To keep it simple we will in this post add a checkbox labelled “Show as button”. In our theme we have CSS that will style a menu item to look like a (call to action) button if the item has a certain class. Instead of forcing the theme user to type out the CSS class “menu-item-button” into the menu item’s CSS class field in admin, we offer them a user-friendly checkbox.
At the end of this post you’ll find some ideas to other actions and filters to use if you want to do more than just add a CSS class.
Let’s start!
Adding custom fields to menu items
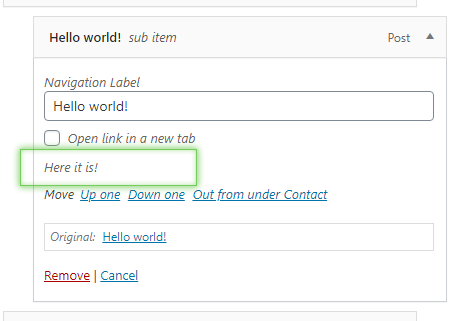
The new hook recently added is wp_nav_menu_item_custom_fields. It’s a hook that fires right above a menu item’s move buttons;
The hook comes with no less than five parameters. In this post we will do things that only require the two first.
item_id: The current menu item IDitem: Menu item data objectdepth: The depth of the menu item within the menu, signified as an integerargs: An object of menu item argumentsnav_id: The navigation menu ID
All inputs added in this hook need to have a name attribute (as the menu editor is a form). The name attribute can be named whatever you’d like but it must be unique, and you have to add the menu item ID (first parameter) inside brackets. E.g. name="my-custom-field[<item ID>]“. This is how the other standard menu item settings do it.
Let’s start with an example of adding a checkbox for making the menu item look like a button when the menu is placed as the main menu. We’ll hook onto wp_nav_menu_item_custom_fields with just the two first parameters and do the following:
add_action('wp_nav_menu_item_custom_fields', function($item_id, $item) {
	$show_as_button = get_post_meta($item_id, '_show-as-button', true);
	?>
	<p class="awp-show-as-button description description-wide">
		<label for="awp-menu-item-button-<?php echo $item_id; ?>" >
			<input type="checkbox"
				id="awp-menu-item-button-<?php echo $item_id; ?>"
				name="awp-menu-item-button[<?php echo $item_id; ?>]"
				<?php checked($show_as_button, true); ?>
			/><?php _e('Show as a button', 'awp'); ?>
		</label>
	</p>
	<?php
}, 10, 2);
At line #2 we fetch the current value of our menu item meta. Menu items use post meta so we use get_post_meta() which you are probably already familiar with. We store the menu item meta data by the key ‘_show-as-button‘.
Then it’s a matter of echoing out some good HTML. The code above uses some of the classes already used for menu items in order to make it look nice without adding custom styling (a p tag with the classes “description description-wide“).
The important parts happen at line #8 and #9. We follow the rule of the name attribute, adding the $item_id in brackets, and we make sure the current saved value is reflected in the checkbox. You can add any type of inputs, and even multiple inputs here. Just remember to provide the appropriate name attribute and set their current value correctly.
With this code in your theme’s functions.php or plugin code, you should now get a new checkbox for all menu items:
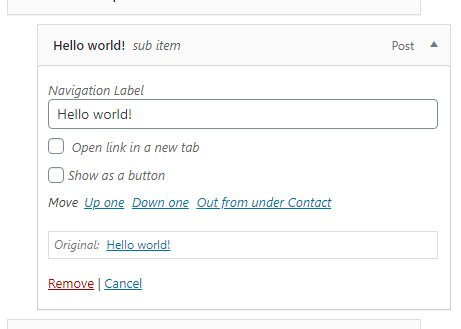
Currently it’s not saving our field. That’s the next step.
Updating the custom fields
In order to update custom fields onto menu items we use the hook wp_update_nav_menu_item. It comes with three arguments but we need just the second which is the menu item ID.
How you handle saving the value of your input(s) is up to you. I’ve chosen to simply save ‘_show-as-button‘ as either true or false. Simply use update_post_meta() and/or delete_post_meta().
add_action('wp_update_nav_menu_item', function($menu_id, $menu_item_db_id) {
	$button_value = (isset($_POST['awp-menu-item-button'][$menu_item_db_id]) && $_POST['awp-menu-item-button'][$menu_item_db_id] == 'on') ? true : false;
	update_post_meta($menu_item_db_id, '_show-as-button', $button_value);
}, 10, 2);
In the code above I fetch the value of the custom field by its name in the $_POST array. Since it’s a checkbox it will either not exist in the $_POST array (unchecked) or it will be returned as ‘on‘. I then update the meta key ‘_show-as-button‘ as either true or false.
With the above code you should see that your field is updating correctly when saving the menu.
The next step is doing something about our custom meta data. And how you go about it depends on what your end result is. As for our example all we need to do is adding a custom class to the menu item.
Update menu item CSS class
WordPress offers a filter on the menu item’s classes: nav_menu_css_class. All we need to do is to add a custom class to the array by this filter if our custom meta is true. We use get_post_meta() to get the value of ‘_show-as-button‘ and if it’s true, we add the CSS class ‘menu-item-button‘:
add_filter('nav_menu_css_class', function($classes, $menu_item) {
	$show_as_button = get_post_meta($menu_item->ID, '_show-as-button', true);
	if ($show_as_button) {
		$classes[] = 'menu-item-button';
	}
	return $classes;
}, 10, 2);
The nav_menu_css_class filter comes with a total of four arguments including the menu arguments and the menu item’s depth. If necessary you can make the class names be affected by these values. For example it would usually not make sense to transform a menu item into a button unless it’s at the top level (and not inside a menu dropdown).
With the above code you should now see that any menu item that has checked for “Show as button” will get the class ‘menu-item-button‘.

Other uses of menu item custom meta fields
As mentioned the process of using the custom fields depends on the end result. It’s hard to make a post that covers all possibilities. But at least this should give you some ideas. The above example showed how to simply add a custom class to the menu item.
In other cases you might want to take advance of the meta data in a menu walker. In most functions in a menu walker you have access to the menu item ID and thus you can easily fetch the meta data.
An alternative to using a custom menu walker you can use the filter wp_setup_nav_menu_item for more control over the menu item object.
Or you can use the filter wp_get_nav_menu_items to for example exclude menu items, if your setting is to limit the menu item visibility.